Sunday, December 23, 2012

Lagenlook for the Holidays

I've been trying to extend my "lagenlook attitude" to most of the new things I make. I needed something to wear to a holiday "Eggnog and Cocktail" party on Friday and that afternoon decided everything I had to wear was too hot, too cold or just not what I wanted to wear with my extra 5-6 pounds in the waist I've managed to put on this month!     I have many versions of black pants and tops so just needed something to wear over them that was quick and easy to make---plus comfortable and washable (in case I spilled eggnog or appetizers on myself!).

Decided on The Sewing Workshop  Eshrug pattern which I've made before and loved. It is  a one piece pattern (plus sleeves) that fits wonderfully---I've previously tweeked it to make it longer with bigger armholes. I was able to get it made with time to spare and had a great time at the party. Even got several comments on my "unusual outfit"
Of course I added my nutcracker necklace and purse made from a thrifted sweater


I'm also continuing to work through the "Pattern Magic Stretch Fabric" book and add to my holiday wardrobe collection.

 Since I want some new tops I decided to try "Full Moon"
It is made from 2 circles sewn together on the outsides. The top one has neck and armholes and the bottom one has the waist hole.  Here are the pics of the pattern and the finished version on my half-size mannequin Dolly.   It is SO convenient to have this little dress form as I can tell by how it fits on her if I want to enlarge the pattern for myself. Here is the top piece with neck and arm holes. You can see how it looks over the bottom piece in the left pic.


Here are the pieces for my top, which are all cut to twice the length and width of the half-scale model
And here is my version from different angles:


These patterns are so fun to work with and I've already started another one that is made from 2 circles but has different openings for the body parts---more tomorrow on it!

Tuesday, December 11, 2012

My most TIME-CONSUMING project ever

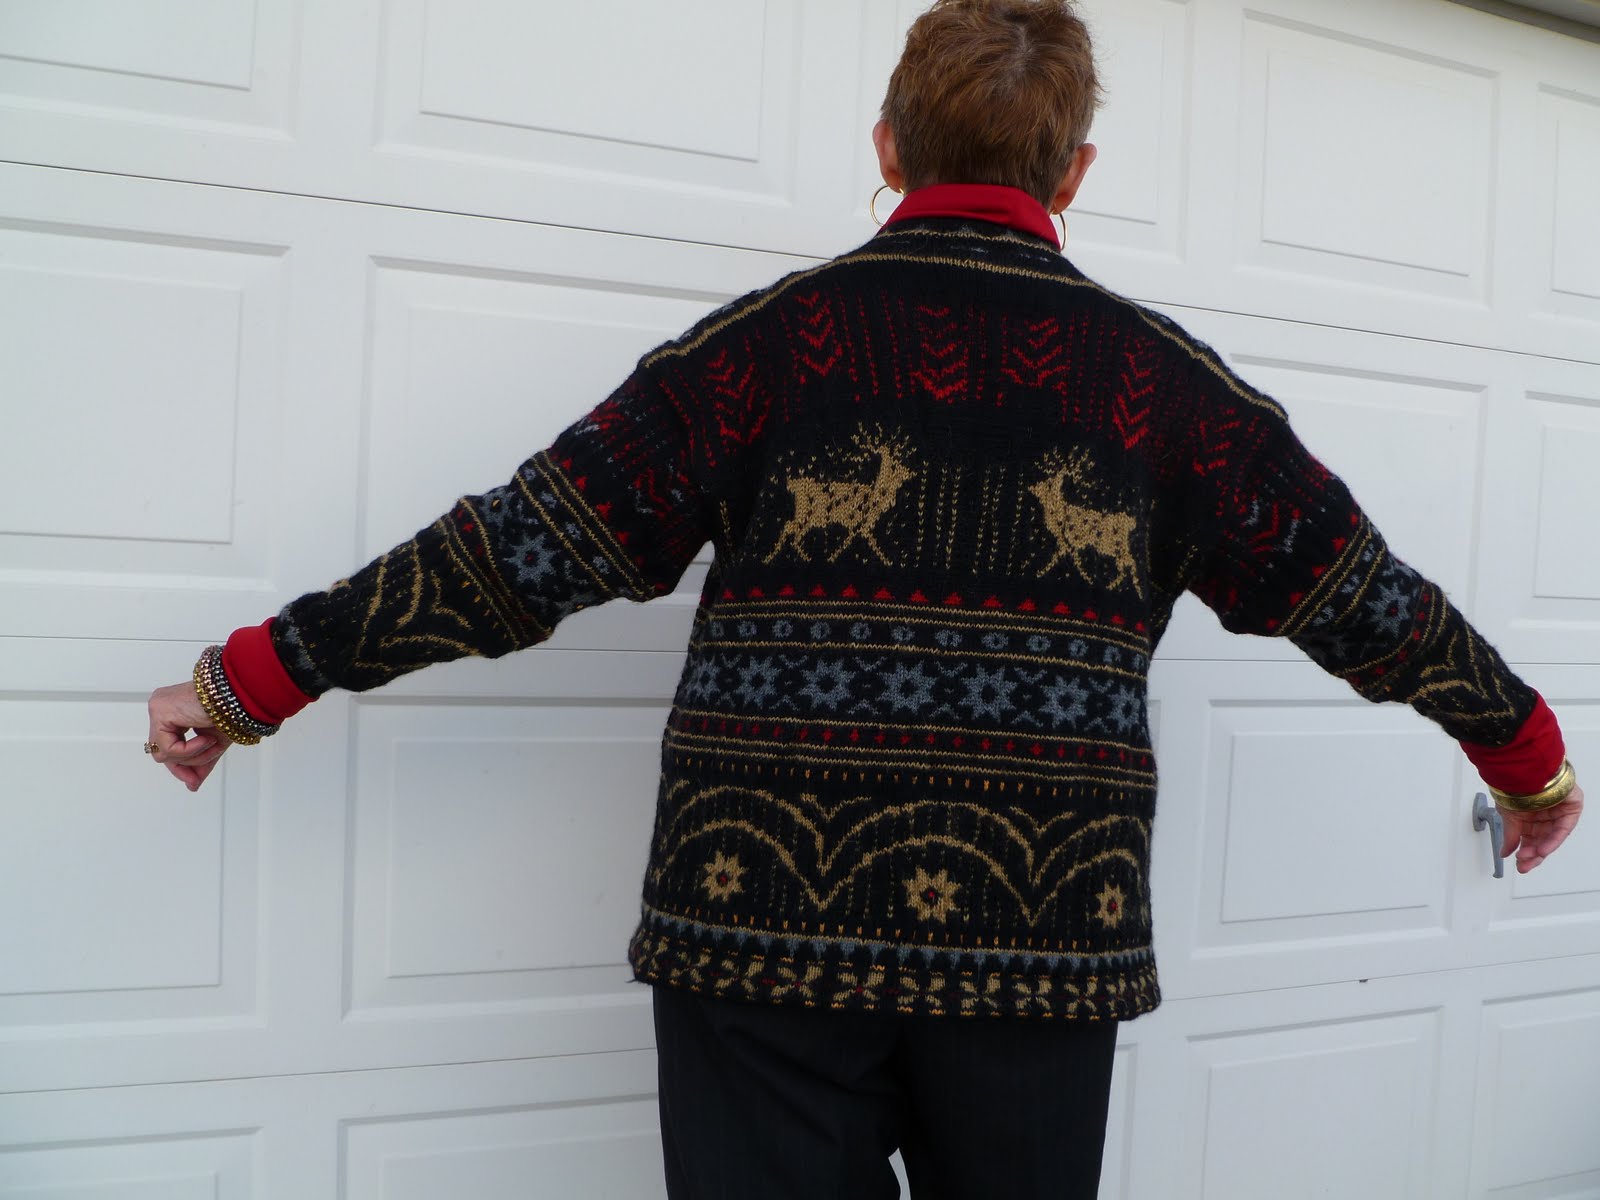
I just finished my first Dale of Norway fair-isle sweater---in time to wear on my holiday trip starting tomorrow!  I think I started this several years ago for the winter holidays, worked on it some last December and put it away when it became evident it wouldn't be finished by Christmas 2011.

I got it out again about a month ago and decided to make a concerted effort to finish it this year. I've been working several hours a day on it----any more time and the graph I followed started swimming before my eyes!   For the last week I have been working on the "finishing up" nearly full time---I learned to make knitted facings and several other interesting techniques. For you readers that knit, you probably know that the fair-isle technique involves holding different colored yarns in each hand, so you are actually knitting both the "Continental" and the "English" (or American) methods at the same time.  I actually found that method very rhythmical and relaxing once I got the technique down.

I'm quite pleased with the fit too. I was able to measure the the length as I knitted but had to "block" the width that I wanted after finishing.

With the afternoon left before starting to pack for my trip, I decided I needed some sort of co-ordinating coat in case the weather turns cold.  I had some good grey fleece and decided to make the "cocoon" coat that Shams just wrote about on her blog http://communingwithfabric.blogspot.com/   

 I made it just like her directions except that I cut a 24" slit up the middle front.   This made mine shorter in the back and with more fabric to fold back on the front.

How ironic that while my sweater took the LONGEST time of anything I've ever made, the coat took just minutes!

I made a few more seasonal accessories to go with my outfit:
                                           Crocheted hat, fingerless mittens and headband
Mobius cowl

That's it for stuff for me---now I'm ready to start working on some Christmas presents for others! I'll be back next week to show those.

Wednesday, November 28, 2012

The Perfect top for Layering

                                                    Vogue 8669

I decided to take a break from my Pattern Magic construction project today and work on my mini-wardrobe that I will be wearing in a few weeks on a trip to see family near Kansas City. I want to have pieces in Blue and Green that can be worn several differnt ways.


Since I've been into the "Lagenlook" scene lately I wanted to be able to layer a different assortment of tops with basic pants for different looks.      Sometimes I layer as many as 3 different tops and want all of the collars to show! In finding the pieces for this look, I think the different necklines that will be worn together are very important (also the different hemlines but I don't need a pattern for that).

What I needed was a middle piece---one that would allow an underneathe turtleneck to peek out but wasn't so large (in the neck area) that I couldn't wear another layer over it. I must have at least 50 different knit top patterns in my stash and finally decided on this one, which turned out to be perfect.

I made it up in green with an underneathe blue t-neck.  The neckline still enabled me to wear my signature (at this time of year) Nutcracker necklace.
I am trying to use some of my self-made knit and crochet items in the wardrobe so here it is with my crocheted purse                                                        
And here it is with my newly "off-the-hook" crocheted tunic----now you can see what I mean about showing 3 different layers at the neckline:
Sweater collar down

sweater collar "draped"
                                                                               
                                                          
I even tried some crocheted "boot toppers" but am not sure if they are a little TOO MUCH?

Now to think of some different tops that will go with my "look"----and a coat coming up too (as soon as I decide what pattern to use).

Tuesday, November 27, 2012

Pattern Magic 3--"Two Peas in a Pod A"


I'm continuing to work my way through "Pattern Magic for Stretch Fabrics", making each design for my Half-scale model Dolly, and then enlarging it for myself if it seems wearable.

The second pattern is again an easy one. The basic premise is to take the sloper pattern and reduce the front to 65% while enlarging the back by 135%, which math tells you results in the overall garment being the size of the sloper.  My pieces looked like this:
Then, gathering all the seam edges on the big piece so they fit the little piece, the 4 seams are sewn together.


The one in the book looked like this:
I added longer sleeves on mine and put it on over the red tee to see the contrast better.
And here are several views in my plain grey model to show the different seam lines. Again, a very fun project yielding a quite unique look without much complexity.  Note that I decided to break out my Nutcracker necklace since there is a little bit of snow on the ground!

Saturday, November 17, 2012

Pattern Magic 3---"Wear it Wrong"

I recently purchased this book and thought it would be fun to try some of the projects in it. It seemed more accessible than the other Pattern Magic books or the Drape, Drape ones because instead of having to trace the patterns, it uses a sloper for a half-scale model, which I happened to have.  Here my model "DOLLY"  is wearing the sloper pattern for a basic top (I added the wrap skirt to avoid embarrassment for her!).
Now that I knew the sloper pattern fit well I was ready to try the first project in the book, called "Wear It Wrong".  There was a bit of humor in the write-up for it, saying that if one happened to put their top on wrong it would still be stylish.  In fact it is a top that can be worn several drastically different ways, with head and arms coming out of different holes in each!
The first step is to make a simple kimono top which you can see here

Then, it instructs you to pull the whole thing to HER left and cut off the right sleeve enough that it will fit over her head.   Her left arm then goes through the original neck hole and her right arm goes through an opening in the right side seam----like this:
Then one can arrange the sleeve in different styles that seem to "work". Here are my attempts:


This was so much fun that I decided I needed one that fit ME! Here it is worn in the traditional way (the only "give-away" is that the right sleeve is shorter so it will fit my neck when I wear it WRONG).
Here I am after turning it around.

:
And here are some ways I tried with using that dropped sleeve in different ways
This was so much fun I can't wait to start the next project in this book.  I have a feeling I will be running through my Knit stash quickly!